Spooky Vegan Mochi Brownies
Unpopular opinion: I love Halloween. Usually, Ber months in the Philippines is automatically associated with Christmas while Halloween is completely overshadowed. But, I think Halloween deserves its own spotlight. There’s something about dressing up in costume and getting free candy that appeals to my inner child. (mostly the free candy though)
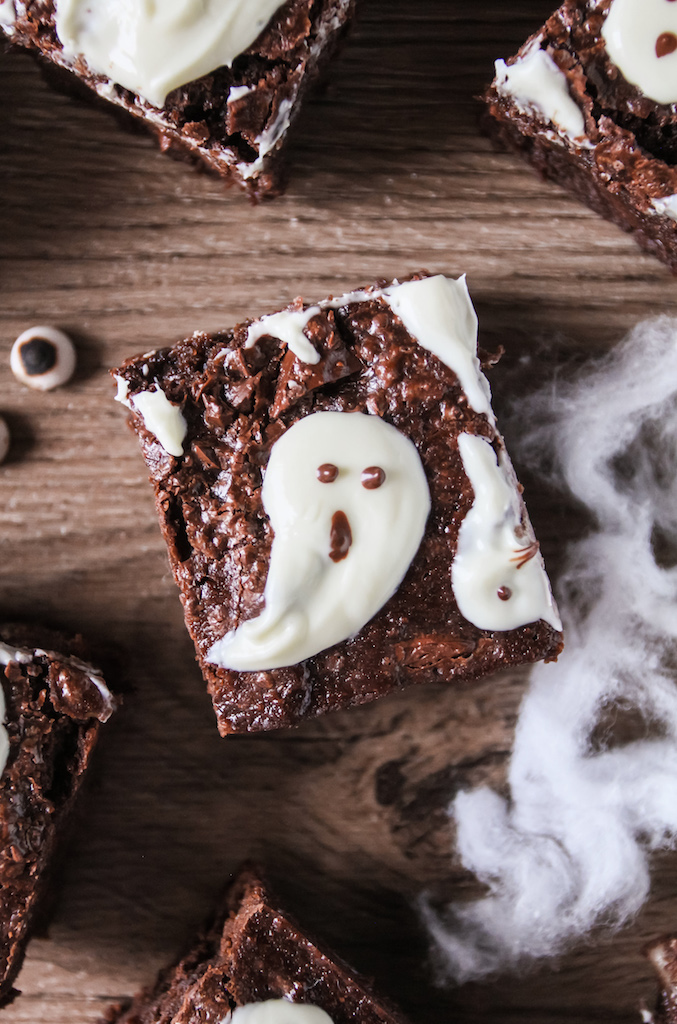
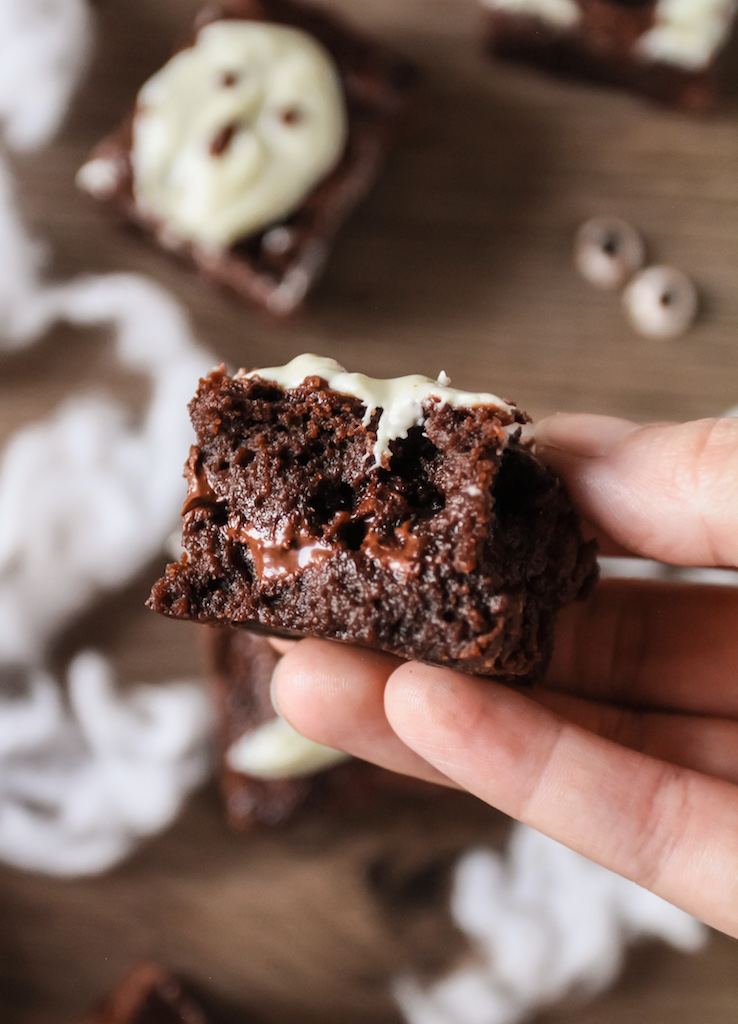
This recipe is a spin off from my best vegan brownie recipe. With the addition of chewy mochi bites and melty chocolate ghosts for a ghostly treat that everyone will enjoy. These Spooky Vegan Mochi Brownies are super fudgy and rich that one bar goes a long way. I jammed so much chocolate chunks into these that it’s borderline profanity. Of course you can add as much (or as little) mix ins as you would like but heck it’s Halloween! I say go all out.
How to make Spooky Vegan Mochi Brownies
Make the Mochi: Use a mix of glutinous rice flour, sugar, cornstarch and milk to create a batter. I use a microwave to steam the batter until the mixture thickens and eventually comes together as a large smooth sticky ball.
Warning: The next steps are going to be very sticky business. Proceed with caution. Transfer the mochi dough to a clean surface dusted with cornstarch. You’ll want to flatten the dough roughly into a ½” thick rectangle then sprinkle more cornstarch on top like this quick video.
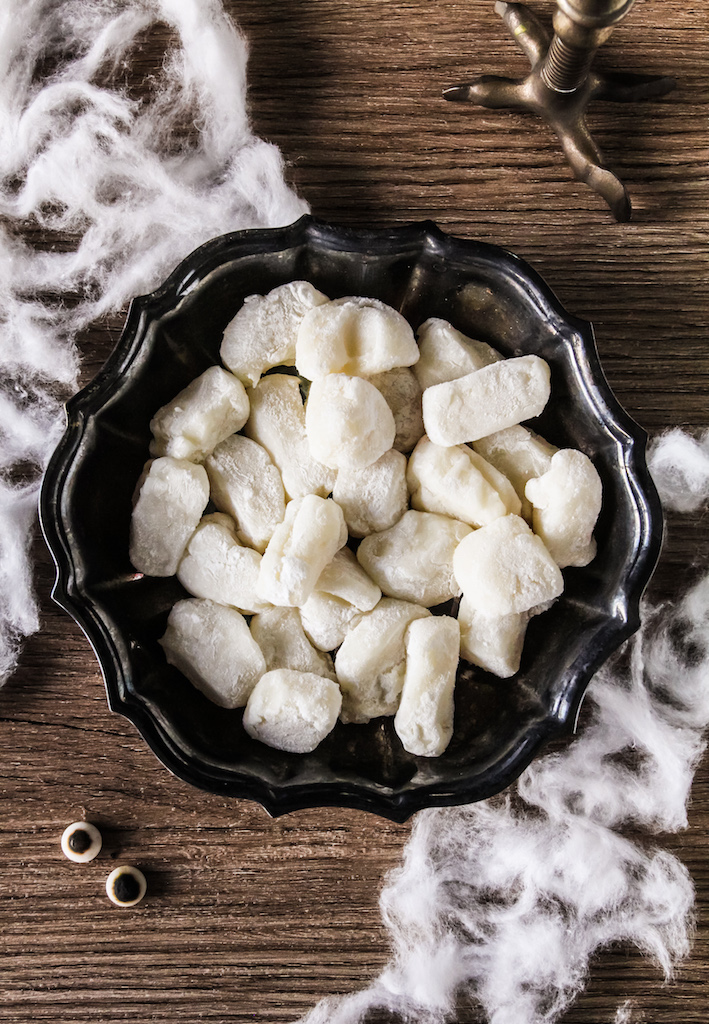
Shaping the Mochi: You can now begin shaping these into lil morsels by using a knife to cut out ½ tsp sized squares/balls. Making sure to lightly roll each ball in cornstarch to prevent them from sticking to each other then shaking off any excess powder off with your fingers. You can also use your hands to shape and cut the mochi but I find the knife method much cleaner.
Start the brownie batter: First, combine the flaxseed with the water so it has time to thicken. Meanwhile, place all your dry ingredients in a large bowl and set aside.
Create a sugar syrup: Do not be intimidated. This step goes by really quickly and is essential in achieving that nice crackly brownie top. All you have to do is dissolve the sugar in water over medium heat, making sure that the syrup does not boil over. You only want to dissolve the granules and not create a caramel.
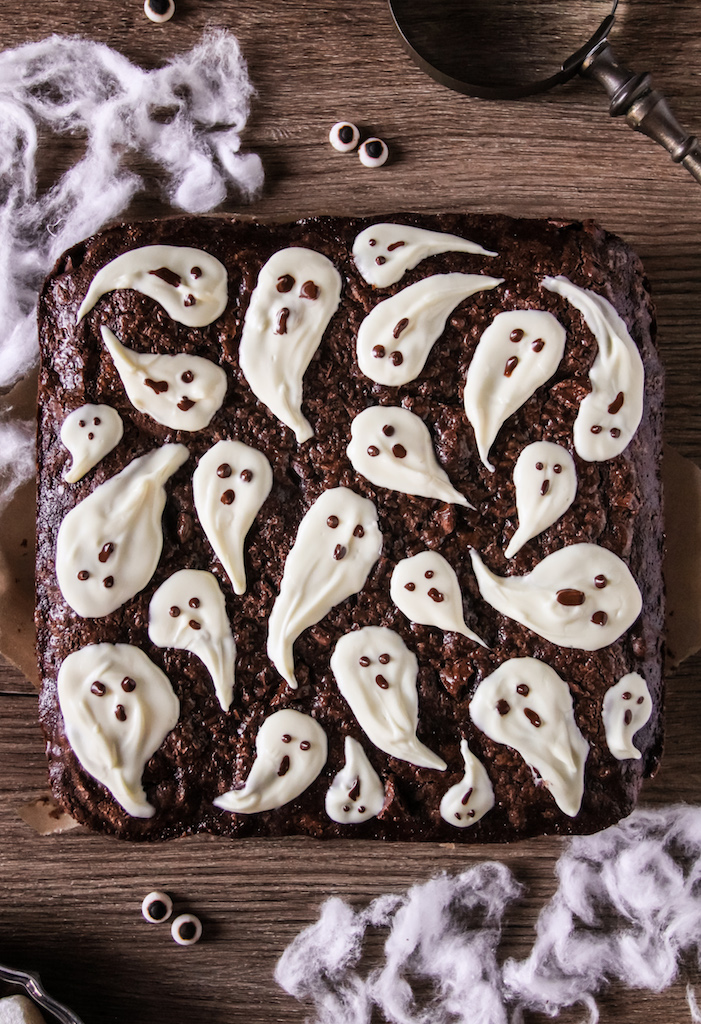
Bake time: Pour in all your wet ingredients (including the flax egg and syrup) to the dry ingredients to create a thick dark batter. Layer the mix ins so you get a bit of everything in one bite. Starting with half the batter, followed by a layer of mochi (as many pieces as you like). Next, add in your chocolate chunks, the remaining batter, finishing with a last scattering of chocolate before baking.
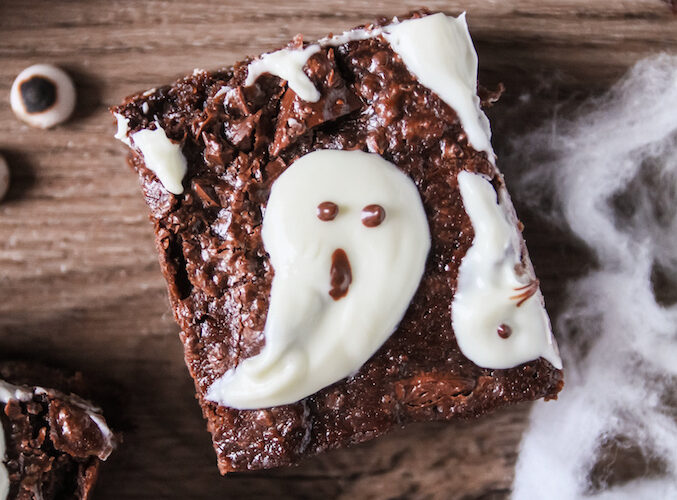
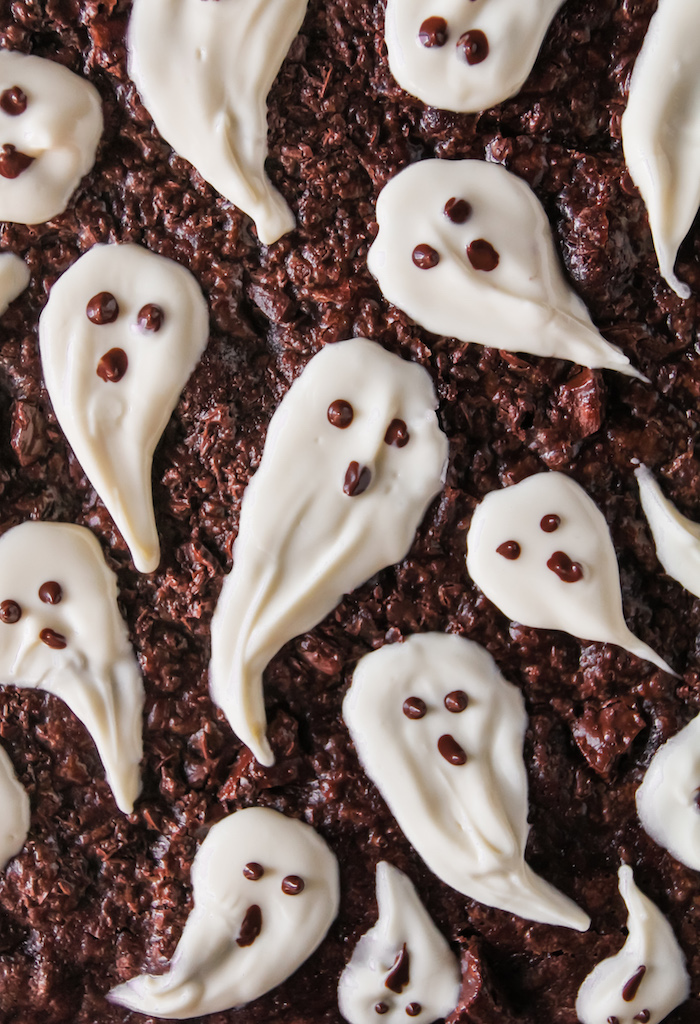
Adding the ghosts👻: Melt some white and dark chocolate separately. Then with a small spoon, pour dollops of white chocolate over the brownies using the tip of the spoon to smear the chocolate and create a wispy ghost effect. Wait for a few minutes for the chocolate to set, then use a toothpick dipped in dark chocolate to create the ghost eyes and mouth. Feel free to get creative and put your own design on the brownies.
Just A Few Tips
- Use a weighing scale for the best results. If you’re serious about baking, often baking or see yourself baking in the foreseeable future then invest in a scale which really elevates the success rate of whatever recipe you try.
- Use good quality chocolate. This is a chocolate forward recipe so use ingredients that you actually enjoy eating. I use 70%-80% percent chocolate bar for these brownies. Avoid compound, milk or white chocolate which would be too sweet for the amount of sugar in this recipe.
- Roll/flatten the mochi dough before shaping. This will make it easier to cut the mochi into the desired size. Make sure you have cornstarch on hand too to prevent the dough from sticking to your hands.
- When making the sugar syrup, use medium heat. The goal is to just dissolve the sugar into the water and not make a caramel.
- You can use any extra mochi to create fruit filled mochis, mochi with red bean paste, mochi ice cream or anything really that can be stuffed in a mochi. I particularly love mochi ice cream.
- The mochi can be made up to 2 days in advance. The brownies (pre-ghosted) can be made in advance and stored in the freezer for up to 1 month. When ready to eat, leave to thaw for 30min to 1 hour. Thawing time depends if the brownies are in slab form or in bars so keep that in mind if you plan to freeze these.
- These brownies last 2-3 days stored at room temperature or 1 week in the fridge in an airtight container.
If you make this Spooky Vegan Mochi Brownies, make sure to leave a comment and rating down below, I would love to know how it went. Also tag me on instagram @unit1404 and hashtag #unit1404 so I can see and share your creations.
Follow me on pinterest and tiktok for more baking updates! Catch up with you soon!
Spooky Vegan Mochi Brownies
Ingredients
Mochi
- 200 g (1½ cup) glutinous rice flour
- 65 g (⅓ cup) granulated sugar
- 40 g (⅓ cup) cornstarch
- 360 mL plant based milk ,soy or oat is best
Brownies
- 235 g (1 cup + 3 tbsp) brown sugar ,packed
- 120 g (½ cup +1½ tbsp) white sugar
- 120 mL (½ cup) water ,room temp.
- 88 mL (6 tbsp) water ,room temp.
- 2 tbsp ground flaxseed*
- 187 g (1½ cup) all purpose flour ,sifted
- 65 g (⅔ cup) unsweetened cocoa powder ,sifted
- ½ tsp espresso powder ,optional
- ½ tsp salt
- 112 g (½ cup) olive oil
- 113 g (⅔ cup) chopped chocolate ,optional, adds extra oomph to already chocolatey brownies
Chocolate Ghosts
- 80 g (scant ½ cup) white chocolate ,chopped & melted
- 30 g (⅛ cup) dark chocolate ,chopped & melted
Instructions
Mochi
- Whisk together the flour, sugar, cornstarch and milk in a large microwave safe bowl. Cover the bowl with cling wrap and steam in the microwave on high for 2 minutes.
- Remove the cling wrap and stir the mixture. Re-cover the bowl with cling wrap and heat again on high for 2 minutes. The mixture should have thickened, should be hard to stir and semi translucent in appearance.
- If the dough remains to be liquidy/milky. Heat covered in 1 minute intervals until it reaches the desired consistency. Stir in between each interval so that the dough remains smooth. Leave to cool for 10 minutes.
- Once the dough is cool enough to handle, transfer to a clean surface dusted with cornstarch. Roll the dough out into a ½" thick rectangle, making sure to sprinkle more cornstarch over the surface if the dough gets sticky.
- Prepare a small bowl with cornstarch. Use a knife to cut small squares of mochi, dropping the squares into the bowl of cornstarch to coat all sides. Brush off any excess cornstarch and set the mochi aside.
Brownies
- Preheat oven to 355℉ (180℃) and line one 8×8" pan with parchment paper. Alternatively, you can grease the pan with butter. Set aside.
- In a small bowl, mix the flaxseed with 6 tablespoons of water then set aside to thicken for about 5 minutes. This will be your flax egg.
- Heat the sugars and the water in a small pot on medium heat until all the sugar granules have dissolved. Avoid boiling the syrup. It should be runny. Leave to cool for 5-8 minutes.
- While the syrup is cooling, mix all the dry ingredients together and create a well at the center. Pour in the olive oil, vanilla, flax egg and the cooled sugar syrup then mix until everything is just incorporated. P.S. A few lumps in the batter are perfectly ok.
Assembly
- Pour half of the batter into the pan. Lightly press the mochi pieces into the brownie batter. adding as much mochi as you like. Sprinkle half of the chocolate over the mochi layer.
- Pour in the remaining batter and sprinkle the last of the chopped chocolate on top. Bake for 30-35min or until a toothpick inserted at the center comes out with a few moist crumbs (aka it will not be a clean toothpick but it shouldn't have wet batter either).
- Leave the brownies to cool for 10 minutes in the pan then cool completely on a wire rack.
Chocolate Ghosts
- With a small spoon, add dollops of the melted white chocolate over the brownies. Then use the tip of the spoon to smear one end of the dollop to create a whispy effect. Wait for 5-10 minutes for the chocolate to set.
- Use a toothpick dipped in melted dark chocolate to create the eyes and mouth of the ghosts. When done decorating, serve and enjoy!

